Showing posts with label Kitchen. Show all posts

Saturday, February 28, 2015

Kitchen Cabinetry

There are two options for kitchen cabinets, purchase pre-manufactured cabinets and have them installed, or have them built on site. The problem with going the pre-manufactured route is that they are made in specific sizes that may not work for your kitchen. You would then need to purchase filler panels to cover gaps they leave behind. Another issue with using pre-manufactured is whether they use mdf (particle board) or plywood and not necessarily being able to make the decision on which to use. If mdf gets any water damage, it bloats and begins to fall apart. Something you definitely do not want anywhere near your kitchen sink.

With this in mind, we decided to have the cabinets built on site. Through word of mouth, we selected Aaron Bell of Fine Edge. With our plans as guidelines, he has built all of the cabinetry.


Our trim carpenter, Aaron, also built a pantry which is functionally used to store a microwave, blender, and standing mixer but secretly conceals the ductwork we had to relocate.


The doors were ordered by a cabinet door maker who comes on site and measures the openings. The doors are then fabricated to match the style we selected. We wanted to have something fairly simple with clean lines. Being tired of seeing so many shaker doors, we selected something just as clean but with a little more detail. Below are all of the doors prior to being installed and an upclose of the detail.


Aaron was also able to add a little detail in the cabinets to match the doors. You can see the trim piece inset in the panel.

Sunday, January 11, 2015

The Open Kitchen / Breakfast Room

The kitchen has been a work in progress over the past 2 months. With the completion approaching, I am ready to sit down and tell you all about it.

Prior to even looking at kitchen cabinets and other finishes, we needed to get the area prepared for cabinet installation. The majority of the demo process and prep work we did ourselves.

We did have a beam installed where the wall once stood. Even thought the wall we removed was not load bearing per se, the continuous rafters supporting the floor above were not sized to span the entire kitchen and breakfast area. The lumber in the ceiling is 2x10 and should be at least 2x12 for the span which is what we found in the basement. Better safe than have a floor cave in.


We also had to relocate some of the ductwork we found in the wall. This did alter our kitchen plans slightly as we would still need to conceal the duct work and the space couldn't be entirely open. We decided to design a pantry to conceal the ductwork.


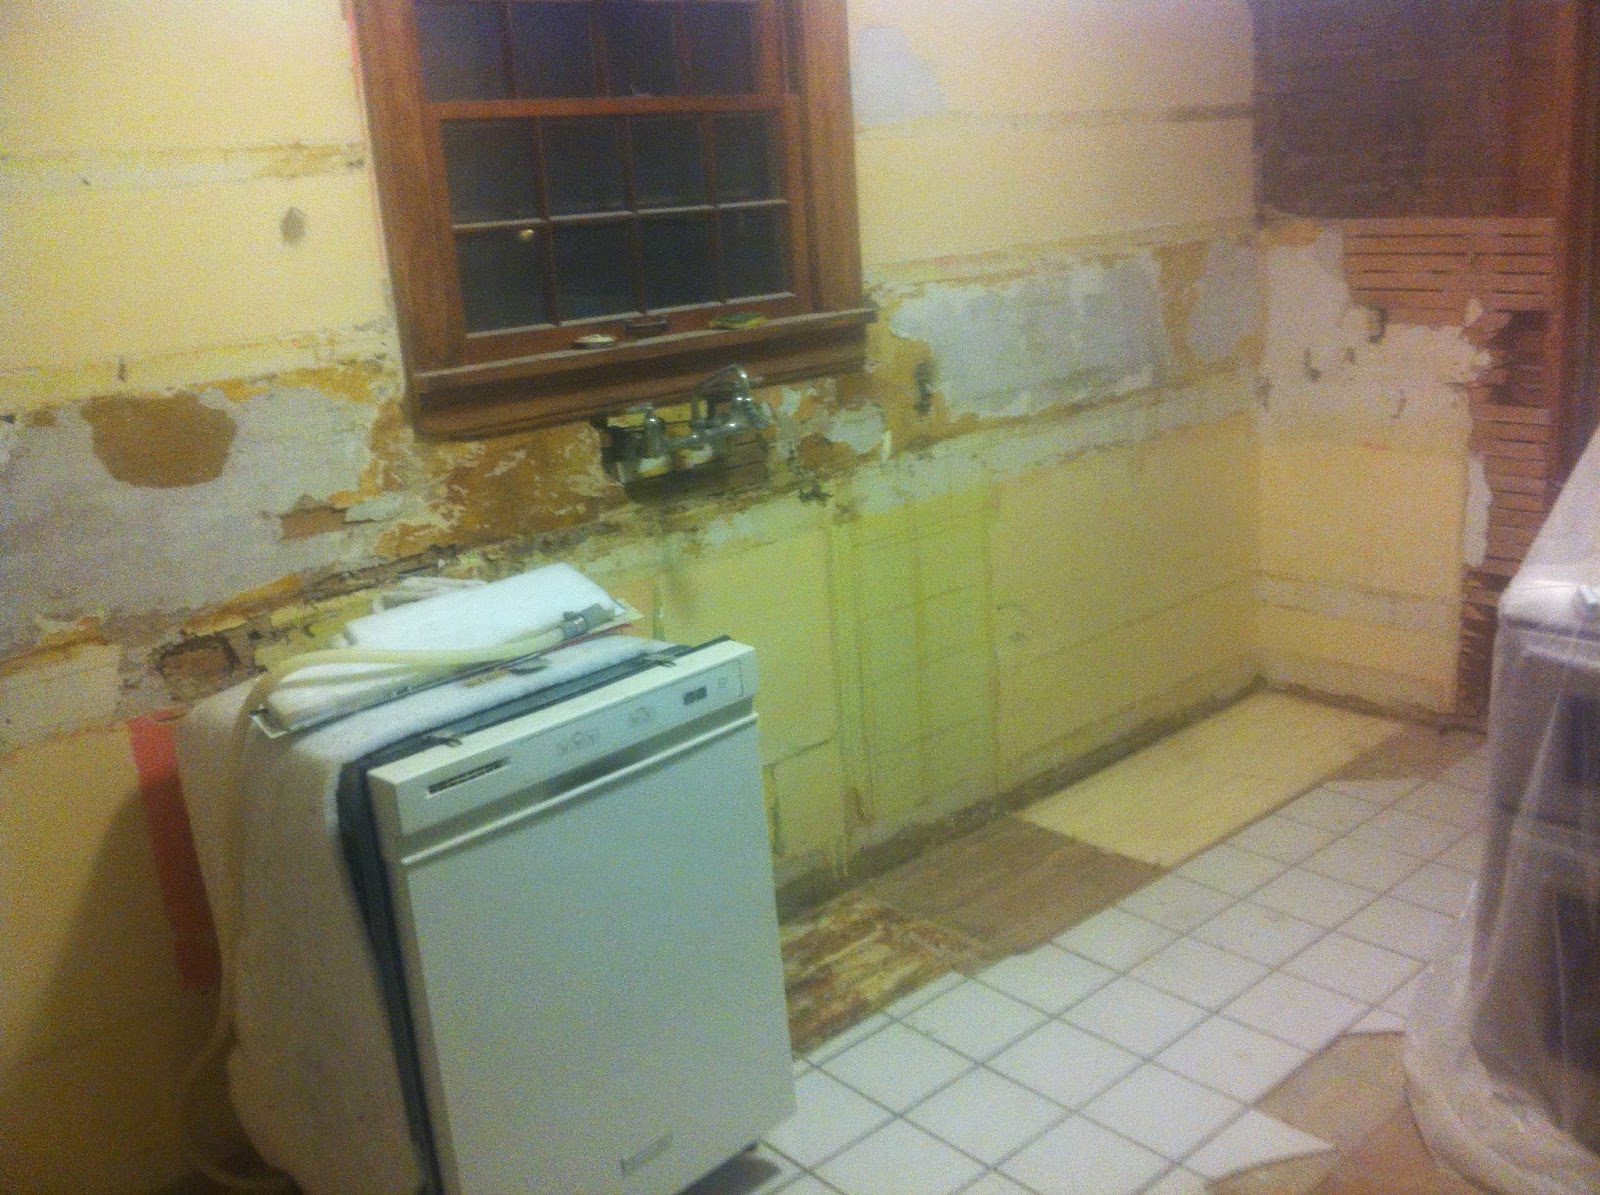
In addition, we had some electrical prep work done before we closed up the walls. This consisted of bringing power for undercabinet lighting, a garbage disposal, and a vent hood. The photos below are what the kitchen looked like before the cabinets would be installed.


Here are the drawings for the kitchen. The bottom right shows the large pantry we designed to conceal the relocated ductwork.

Kitchen Countertop

Shopping for a kitchen countertop was one our favorite shopping experiences for the house. I contacted a tile rep that my office uses quite frequently as they are also a stone fabricator, Elegance in Stone. While they had a several slabs in stock, they suggested we also look at a few warehouses that bring in stone from all over the world. These are essentially giant warehouses with hundreds of 5'x9' stone slabs. While there are several granite slabs that look verysimilar, there are these amazing quartzite slabs. One can't help but be amazed that the earth can produce such beauty below the surface!


After spending several hours at a 2 of these warehouses, we narrowed are selection down and then discussed pricing with our fabricator. Below you can see our selections: Black Soapstone, Sea Pearl, Madre Perola, and Straito Olympico.


Another really interesting part of the process is working with the fabricator once the slab is selected. As there is variations in the stone, we were able to select which part of the slab we wanted to use. Below is a photo of our template laid on the slab before it is cut.


In the end we selected the Sea Pearl, a quartzite from Brazil. It turned out absolutely beautiful and we are extremely happy with the results!


Thursday, December 4, 2014

Kitchen Floors Part 2

I am really drawn to painted wood floors and have looked at countless images for inspiration. When it came down to it, we decided to go with our gut after looking at a few stains on the floor. Below is an image of a soft gray, espresso, and black.


While I really liked the color of the soft grey, we were not as happy will the orange of the pine showing through. If the wood floor did not have so much orange/red we may have selected this stain. What we didn't like about the espresso was how muddy it ended up looking. The grain in the wood didn't pop as much as it did with the black. Hence, we selected the black.

Below is a picture of the staining process and the final result. As the stain was not as translucent as we had desired, I used the brush to wipe off some on the stain allowing the grain to show through.


After the stain came the varnish.

The only thing left is the painted border which will follow after the cabinets are installed and painted.

Tuesday, December 2, 2014

Kitchen Floors Part 1

We have been going back and forth for some time as to what will become of the kitchen floors.

We first were looking at a very contemporary ceramic tile that emulated natural stone. When we had a structural engineer come and look at the house since deciding to take down the wall he advised against it. We would need to add a column in the basement as the weight of the stone and the removal of the wall may cause the floor to deflect too much.

Next we thought of adding a floating cork floor over the existing pine floors. The reason being that the backer paper and glue for the original laminate was going to be a pain to remove and therefore no way to stain or even paint the original pine boards.


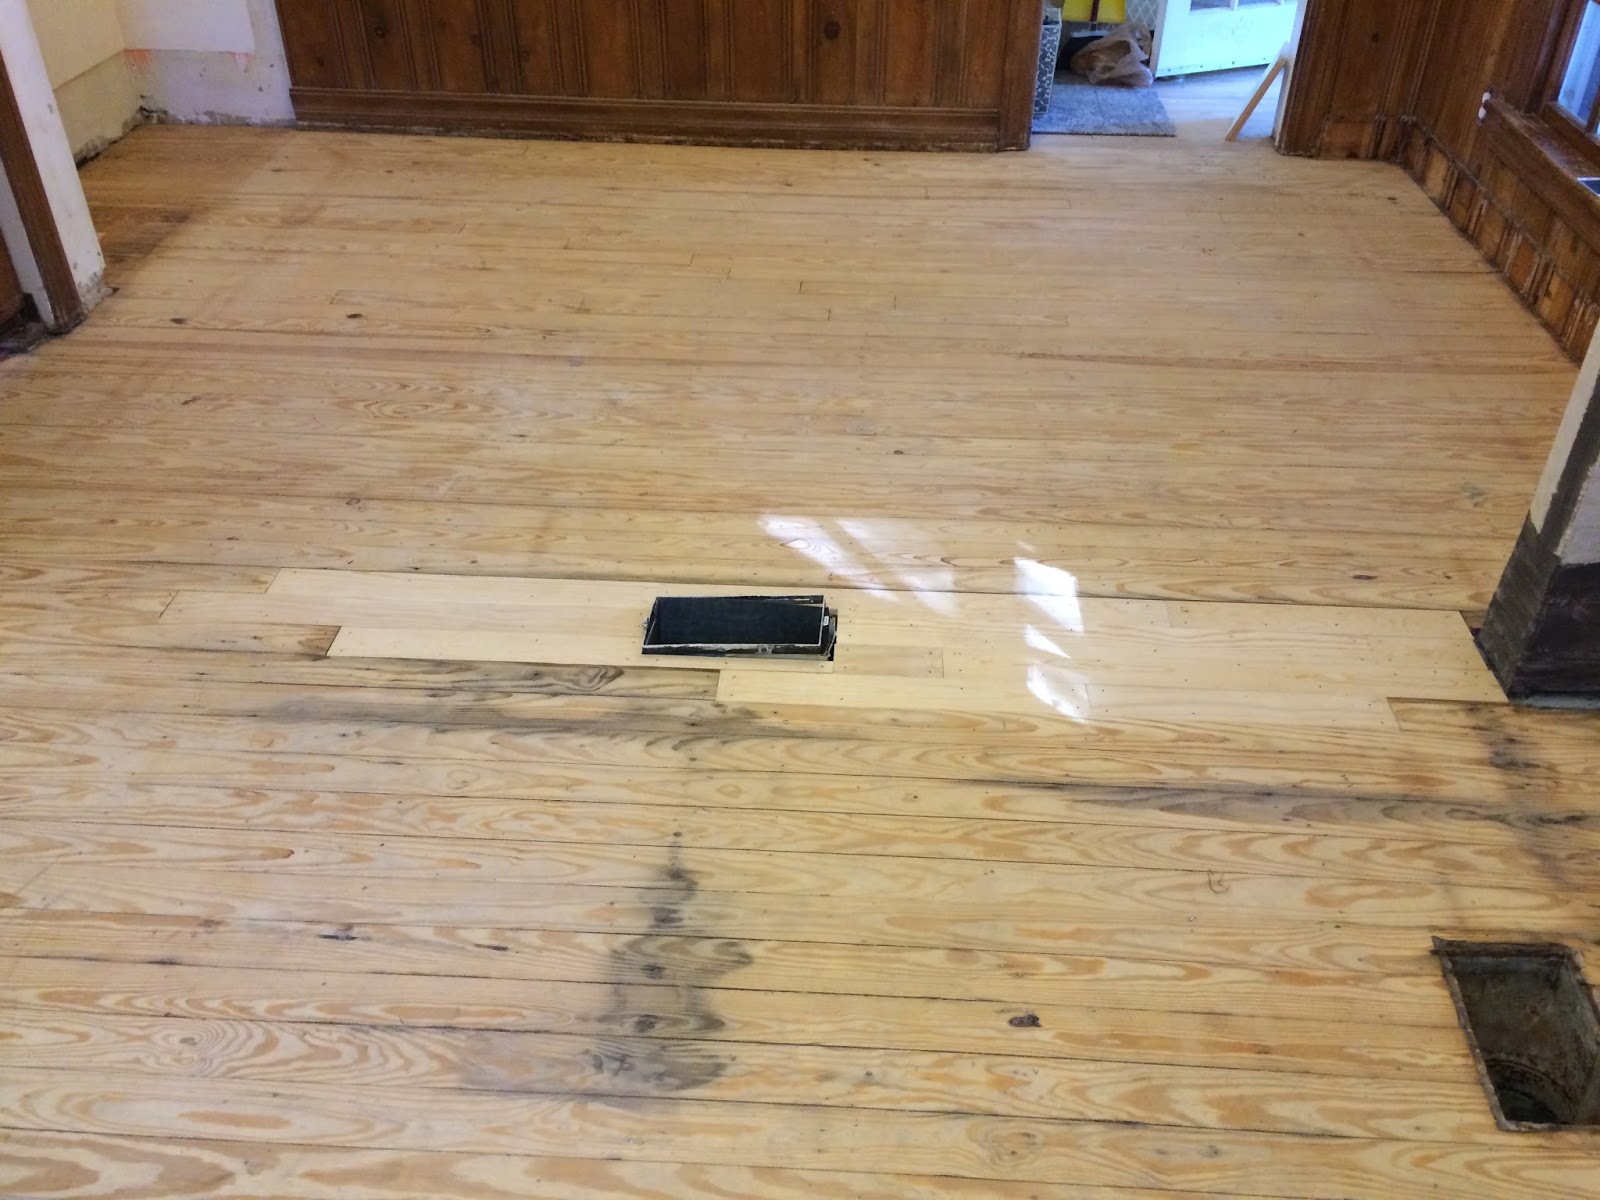
However, to our surprise, our flooring guy decided to sand all of that away. Which was probably since he felt bad that it was taking the remainder of our floors so long to complete. (6 weeks instead of 2) Below is a picture of the before and after of pine floors were sanded.


After this little surprise, we finally decided on staining the majority of the floors and then painting a boarder once the cabinetry was installed. But first as you can see from above, we need to fill the missing boards. This was a little tricky as we would need to find wood that was the same species, size, and thickness. We ended up using a pine board that is typically used for building furniture. Our flooring guy may scoff at this if he ever reads this post but the end product looks pretty good.


Sunday, August 10, 2014

Kitchen Demo Cont'd

Well, we've been so busy working on the house, we've fallen behind on the blog. Plenty of updates so let's get right to it.

The kitchen demo is progressing well. When we last left off, we had opened up the center wall to find its containing ductwork. We've since opened up the ceiling at the top of the wall to learn that the wall is load bearing. Slight changes of plans, we'll need to add a beam to carry the floor above. This will also include two posts that will go all the way down to the basement floor.


Regarding the ductwork, we've met with an HVAC contractor and discussed how to move it. We'll need to reorganize the ductwork and some water pipes in the basement, but we should be able to jog the bedroom supply and return against the south wall. The structural beam will actually gives us something to jog the ducts against and we can fur it out. Combine that with a millwork piece at the south wall and the ducts should be completely concealed.

We then moved the demo effort to the wall behind the stove. Nothing fancy, right? Well, the ceramic tile (and its full mortar bed) came off the wall in one piece. Cory was temporarily pinned between the wall and the stove, but he managed to break it down into small pieces (no small task).


Next up, take down the plaster and lath, the surprises continued. Within the wall we found a weird abandoned pipe (old stove exhaust?), random batt insulation (surprising for a 1938 house), and termite damage. Now, the termite damage is not active (thankfully), but we will need to remove the damaged wood and scissor in some new studs. (Click on the image to enlarge)


Good with that wall, on to the buffet. Now you see it, now you don't...


The hutch that we currently have in our kitchen will fit in this opening perfectly (after we trim off part of its legs, of course).

Let's keep going. Lower cabinets and the kitchen sink, sayonara!


And last, but not least, the flooring. If you remember, we're taking out the ceramic tile, a layer of plywood, a layer of mdf, and the linoleum to get down to the original hardwood floor. We found some pretty cool colored striping in the linoleum, but nothing could have prepared us for this gem:


Custom linoleum inlay, pretty cool stuff. Nonetheless, its all gotta go, let's see those original hardwood floors pre-sanding:


The original plan was to lay new ceramic tile throughout the kitchen (we already have the tile picked out), but when we learned that the center wall is load bearing, it also meant that it's helping to hold up the kitchen floor (because there is no wall below in the basement). Without the wall, the weight of ceramic tile may create some deflection in the floor and cause cracks. With that in mind, while our flooring guy is redoing the hardwoord floors throughout the house, he will check out the kitchen to see if we can get past the linoleum glue and save the hardwood. If so, we will most likely paint it.

It's been an exhausting three weeks demo-ing the kitchen, but its all done. Just in time for special garbage pickup ;)

Let us know what you think and stay tuned, we've also been painting......